Advice
10 Proven Techniques to Overcome Writer’s Block
1. Cognitive Refresh: The Break Technique

2. Stream of Consciousness: Freewriting

3. Environmental Psychology: Changing Your Surroundings

4. Neuroplasticity and Habit Formation: Establishing a Routine
5. Cognitive Stimulation: Using Writing Prompts
6. Collaborative Learning: Talking It Out
7. Perfectionism Deconstruction: Embracing Imperfection

8. Cross-Disciplinary Creativity: Engaging in Other Art Forms

9. Goal-Setting Theory: Setting Small, Achievable Targets
10. Analytical Reading: Learning from Other Writers


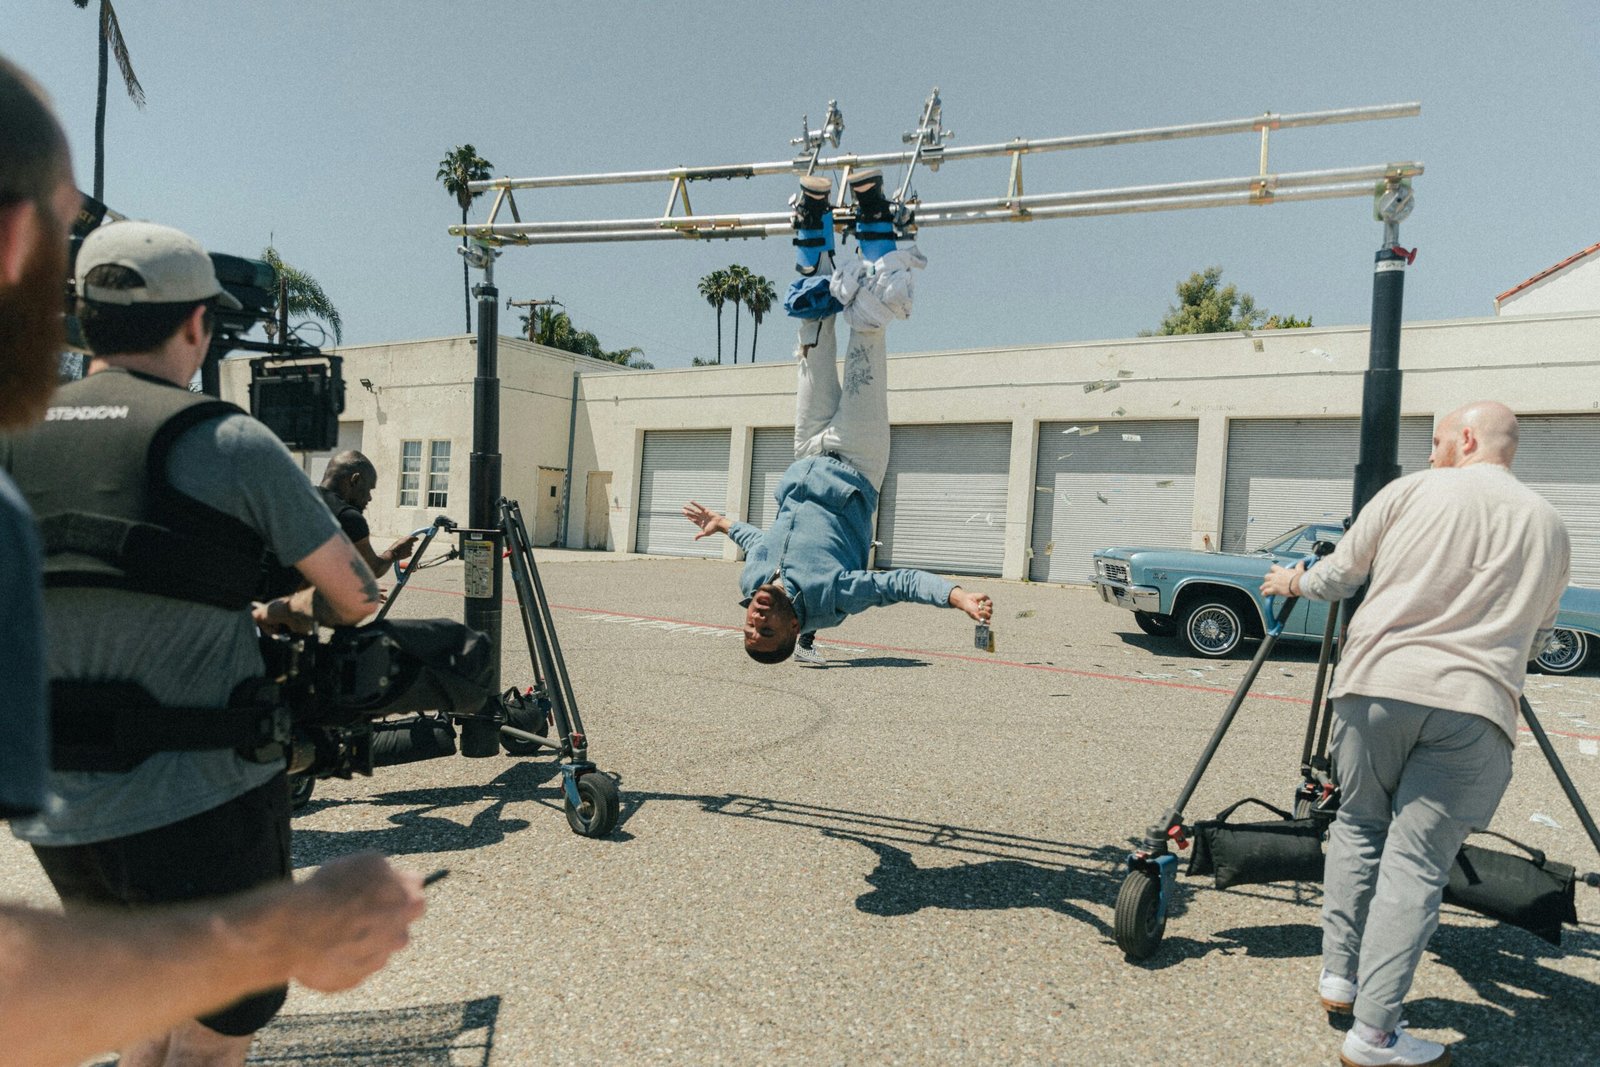
If you are making an indie film in 2026, the harsh truth is this: getting your movie finished and on a platform is no longer the hard part—getting paid is.
More films are being made than ever, distribution is technically easier, but revenue per title is thinner and attention is brutally fragmented.
The filmmakers who are still making real money are not the ones waiting on a miracle streaming deal. They are the ones treating their film like a business from day one and building multiple income streams around a clear audience.

1. They Pick A Profitable Film Type
By 2026, industry voices are clear: most indie films lose money not because they are bad, but because they are built in the wrong category.
The projects that consistently work fall into three lanes: contained genre films, niche‑audience films, and platform‑native projects.
- Contained genre (usually horror/thriller) wins because budgets stay low, hooks are simple, and global genre audiences are always hunting for new titles.
- Niche‑audience films aim at a specific community—faith‑based, diaspora, LGBTQ+, true crime, or professional/educational groups—and monetize depth, not mass appeal.
- Platform‑native projects are designed for YouTube, TikTok or vertical drama platforms first, focusing on retention, recurring episodes, and community, then later spinning out into features or specials.
If your film does not clearly sit in one of these lanes (or intentionally combine them), your odds of recouping drop fast.
2. They Use Hybrid Distribution, Not Just “Pray For Netflix”
Experienced producers now treat hybrid distribution as the default, not the backup plan.
Rather than chasing one big check, they stack windows: festivals or event screenings, transactional VOD, ad‑supported platforms (AVOD/FAST), niche streamers, community screenings, and educational or territory sales.

Commentary from 2026 emphasizes that many indie films now generate their first meaningful money from AVOD/FAST exposure and niche platform deals, not prestige SVOD buys.
Educational licenses, targeted theatrical runs, and community tours can also push a well‑positioned film into six‑figure revenue even on modest budgets.
The point: filmmakers making money in 2026 are not hoping for “one big sale.”
They design a revenue ladder—several smaller checks that add up over time.
3. They Build An Audience Before Picture Lock
The filmmakers who will thrive in 2026 are the ones who start audience‑building as soon as they start development.
Industry advice is blunt: if you do not have a few thousand people waiting for your trailer, your film is functionally invisible on day one.

Winning filmmakers treat their project like a startup:
- They collect emails, DMs, and community members months before release.
- They share behind‑the‑scenes content, concept tests, and character moments on social platforms to validate demand.
- They line up partners—podcasts, newsletters, community leaders—who can help drive the first wave of views or ticket sales.
This audience then powers crowdfunding, launch‑day sales, merch, and even future projects.
4. They Think Like Producers, Not Just Directors
In 2026, investors and buyers are saying yes to filmmakers who show they understand the commercial side, not just the artistic one.
Thought leaders keep repeating the same idea: ideas don’t get funded, producers do.
That means:
- Clear budgets that match the realistic earning potential of the project.
- A one‑page plan for who the film is for, how it will reach them, and which revenue streams are in play.
- A willingness to scale down the dream if the numbers don’t add up—better a lean, recoupable film than a bloated “donation.”
If you want to make money as an indie filmmaker in 2026, start by asking two questions:
Which lane is my film in—and exactly how does it get paid.
By Bolanle Media | The Roselyn Omaka Show
You have probably said it before. “Pay attention.” “Just try harder.” “Why don’t you remember anything I taught you?”
And your child — or maybe the child you once were — looked back at you with that blank stare. Not defiant. Not lazy. Just… gone.
What if that was never a focus problem? What if it was never about ability at all?
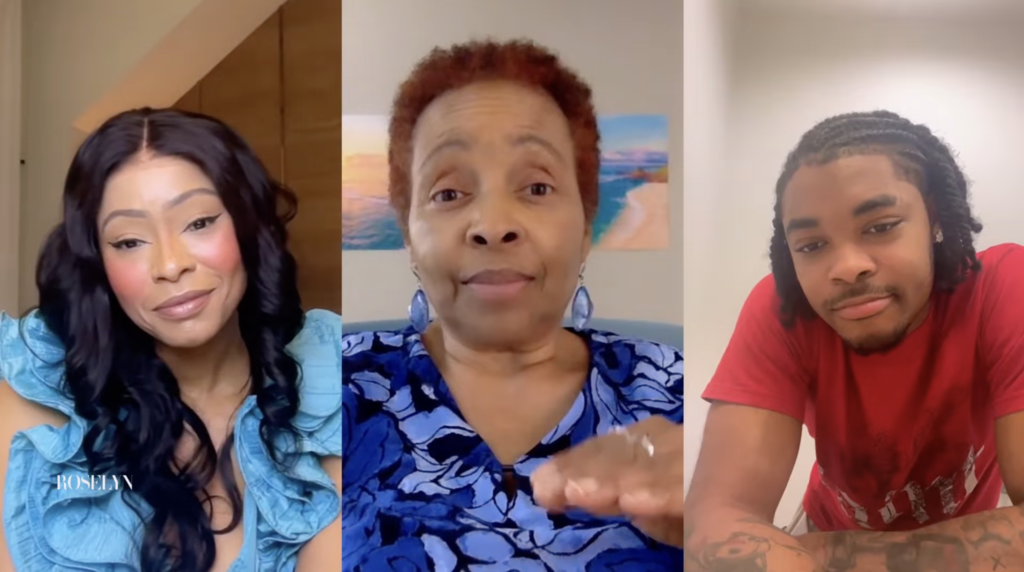
Educator and emotional intelligence strategist Selina Joy Jackson has spent her career answering that exact question. In a candid, wide-ranging conversation on The Roselyn Omaka Show, Jackson sat down with host and Bolanle Media CEO Roselyn Omaka and co-host Chris Gone Crazy — the Houston-based content creator with over 5 million followers across TikTok, Instagram, and YouTube — to break down what is really happening inside the minds of kids who struggle, and what parents, teachers, and communities can actually do about it. What she shared changes everything about the way we think about learning, behavior, and the kids we keep calling problems.
Memory Is Mood Related — And Nobody Told You That
Here is the science that should be taught in every teacher training program but isn’t.
Your brain stores memories attached to the emotional state you were in when you learned them. That means if a child sits in a classroom feeling anxious, overwhelmed, or emotionally unsafe — they can learn the material in that moment, but to recall it later, their brain has to return to that same emotional state.
Who wants to go back there?
This is why your child remembers nothing from the class they dreaded. This is why you can recall every detail of a vacation but blank on what you studied the night before a test you were terrified of. It is not intelligence. It is neuroscience.
The fix, according to Jackson, is simple and radical at the same time: feel good first. Not after the lesson. Not as a reward for good behavior. First. Before anything else is introduced.

The Hidden Block Nobody Is Talking About
Jackson calls it the “hidden block” — and once you see it, you cannot unsee it.
When a child is stressed, scared, or emotionally dysregulated, their brain shifts into survival mode. The prefrontal cortex — the part responsible for focus, reasoning, and learning — essentially goes offline. The brain is too busy managing perceived threat to take in new information.
From the outside, this looks like:
- Refusing to try
- Zoning out in class
- Acting out or shutting down
- “Not caring” about school
But none of that is attitude. It is biology.
Jackson developed a four-step framework to address it directly:
Recognize — identify that a hidden block is present
Regulate — help the child (or adult) return to a calm state
Repattern — build new emotional habits and responses
Return to Learning — now the brain is actually ready
This framework is the backbone of her book Break the Hidden Block and her EMOMASTERS® program, which gives kids and parents practical tools to move through each step.
The Need to Control Is a Survival Response — Not a Personality Trait
One of the most powerful moments in Jackson’s conversation on The Roselyn Omaka Show came when she broke down what the psychological need for control actually is.
Micromanagement. Overthinking. Anxiety when outcomes are uncertain. Needing to know every detail before you can relax.
Most people think that is just who they are. Jackson says it is what their nervous system learned.
When the subconscious mind treats control as a need — something without which it cannot survive — it triggers the same stress response as a physical threat. The anxiety is not about the situation. It is about a deeply held belief that says: without control, I am not safe.
The shift is not about letting go of your ability to direct outcomes. It is about releasing the desperation. Drop the need. Keep the power. Those are two very different operating modes.
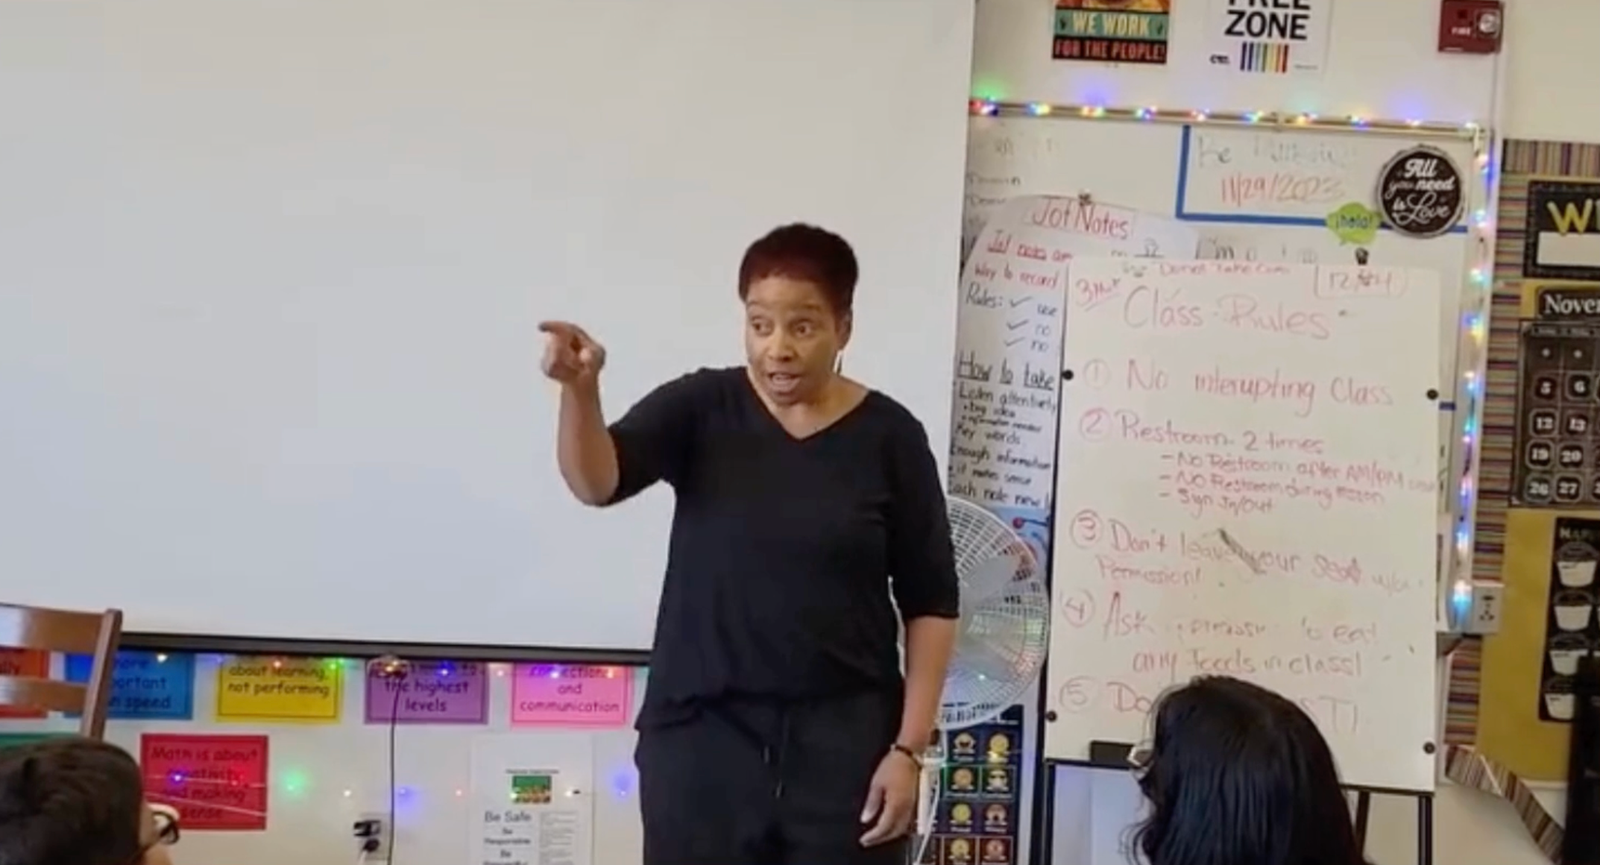
What the School System Is Still Getting Wrong
Jackson does not mince words on this one.
Schools are designed to deliver information. They are not designed — at least not yet — to first ensure that the people receiving that information are in a state where they can actually absorb it. A child who walks into a classroom carrying last night’s argument, this morning’s hunger, or a month of feeling invisible is not a learning-ready brain. They are a survival-mode brain in a chair.
Telling that child to focus is like telling someone with a broken leg to run.
The research backs this up. Studies consistently show that emotional dysregulation is one of the strongest predictors of academic struggle — stronger, in many cases, than cognitive ability. Kids who cannot regulate their emotions cannot access their own intelligence.
Jackson’s tools are designed to bridge that gap — for classrooms, for homes, and for the kids who have been written off as problems when they were really just overwhelmed. You can explore her full programs and workshops here.
Tools You Can Use Right Now
Jackson has built an entire resource library around this work. Here is where to start:
Break the Hidden Block — her foundational book on the science of emotional blocks and how to dismantle them. Start here.
EMOMASTERS® Unstoppable Me Program — a practical toolkit for parents and educators to use with kids, helping them recognize and regulate their emotions before those emotions take over.
Brain-Ready Classroom Library — built specifically for educators who want to create learning environments where kids can actually receive what is being taught.
Math Magic Library — Jackson’s work connecting emotional readiness to academic subjects, including math, which is one of the highest-anxiety subjects for struggling students.
Feel Good First Course — the starting point for anyone new to her work. Brain-based, practical, and accessible for parents, teachers, and students alike.
Connect With Selina Joy Jackson
Follow her work and stay connected across her platforms:
- Website: selinajoyjackson.com
- Instagram: @selina_joy_jackson
- YouTube: Selina Joy Jackson
- LinkedIn: Selina Joy Jackson, MA
- Book a call or speaking inquiry: Contact Selina
The Line That Stays With You
Toward the end of her conversation on The Roselyn Omaka Show, Jackson said something that quieted the room.
“You’re not alone and you’re not broken.”
It comes from her own story. From the foster care homes. From the classrooms where she sat feeling invisible. From a kid who the system had plenty of explanations for but no real solutions.
She became the solution.
And now she is handing those tools to every parent, teacher, and child who needs them — which, if we are being honest, is most of us.
Watch the full episode of The Roselyn Omaka Show with Selina Joy Jackson on the Bolanle Media YouTube channel. Link in bio.
Follow Bolanle Media for conversations that make you see the world differently.
If you are still approaching independent film like it’s 2015, you are going to get crushed. The landscape that once rewarded a scrappy feature and a couple of festival laurels has become a crowded, algorithm‑driven marketplace where attention is the rarest currency. Recent industry analysis on “inflection points” for 2026 all say the same thing: the business model for independent film has changed, whether you like it or not.
1. You’re Competing With Everything
Your film is no longer just competing with other indie features. It is fighting for attention against TikTok clips, prestige series, and endless back catalog on every streaming platform. That means “pretty good” is invisible. You either have a sharp, specific audience and a clean logline, or you disappear into the scroll.
2. Festivals Are Not a Distribution Plan
A festival premiere and a few Q&As can help with credibility, but they are not a business strategy. Without a parallel plan—email list, community building, partnerships, and a clear path to paid viewers—you come home with a laurel and no deal. Even festival‑aligned organizations now frame their “don’t miss indies” coverage as part of a broader visibility and audience strategy, not a finish line.
3. The Middle Is Collapsing
Industry voices are blunt about it: micro‑budget genre films and clearly branded auteur work still find lanes, but the soft, mid‑budget drama with no hook is almost impossible to monetize. If your film cannot be pitched in one or two sentences to a specific audience, it will struggle regardless of how “good” it is.
4. You Are a Small Business, Not a Starving Artist
The indie filmmakers who will survive 2026 are treating their careers like businesses. Guides focused on creating a “film business turnaround” talk about lifetime value, repeat customers, multiple revenue streams, and audience retention—not just finishing one feature. Your filmography is a product line, not a lottery ticket.
5. SAG Is a Competitive Advantage
SAG actors and union rules are not your enemy; they are a way to level up. SAGindie and SAG‑AFTRA low‑budget agreements exist to help genuine independents hire professional talent and present themselves as serious, compliant productions. Understanding those tools gives you access to stronger cast, better reputations, and more credible pitches.
6. Streaming Is Not a Golden Ticket
Streaming is no longer the dream “one deal solves everything” outcome. The deals are leaner, the competition is brutal, and many filmmakers now make more by going direct‑to‑fan through TVOD, memberships, or niche platforms than by chasing a low‑MG all‑rights license. You need to know why you want a streamer—brand value, audience reach, or pure revenue—and plan accordingly.
7. Format Matters Less Than Relationship
Audiences care more about access than whether your project is a feature, series, or hybrid. If you give them a reason to show up repeatedly, they will follow you across formats. If you do not, a 90‑minute feature is just one more piece of content in an endless feed.elliotgrove.
8. Marketing Starts at Concept
Marketing is not something you “figure out later.” The most effective 2026 indies build their hook at the idea stage—title, poster, and logline are treated as core creative decisions, not afterthoughts. If you cannot imagine the trailer, one‑sheet, and social teaser while you are still outlining, that is a red flag.

9. Community Is Your Real Safety Net
Filmmakers who plug into networks, reading lists, and producer education hubs are adapting the fastest. They are not reinventing the wheel alone; they are leveraging shared knowledge, updated contracts, and peer feedback to make smarter decisions project by project.
10. Accepting Reality Is Your Edge
Here is the real brutal truth: if you can accept all of this, you gain an edge. Most of the field is still clinging to old myths about discovery, “overnight” success, and festival miracles. If you are willing to treat your indie career as a living, evolving business—grounded in current data and audience behavior—2026 might be the moment where “truly independent” stops meaning powerless and starts meaning in control.

They Told Him a Black Man Can’t Learn. He Sued Them and Won.

Jay-Z Locked In Tyla. The Industry Is Shaking.